Monday, May 15, 2017

eComm Year Reflection

I hope you enjoy my Demo Reel!

I can't believe my time in eCommunication is over. It has been an incredible four years and I believe that because of this program, I am prepared for what college has in store for me.

Something that I have taken away from my experience in eComm is that animation takes patience and motivation. You have to really have to love it beacuse animation takes time. The story you tell has to inspire you because if you don't love what you are doing, then you'll never find the motivation to finish it.

I learned this while making my Day Dream animation. That short took all school year to make. However, I was passionate about it. I wanted to challenge and push myself as an animator. I worked outside of school drawing the frames I needed for each scene. It was difficult because I had never made a hand drawn full animation before. This video involved nonstop movement which means it involved a lot of work.
During the first semester of senior year, I had completed three fourths of the animation, however, when I watched the video, it was choppy. I spent a lot of time during second semester going back and adding frames to make the film flow more smooth.
I believe this project made me a better animator by testing and advancing my skills. I know now that my strengths include storytelling and determination. I always stick with my storyboard and make sure that the shots I use help tell the story better. My weakness in animation is that I am not consistent when numbering my frames per second. If I practice this more, the timing of my animations would be better.

I am going to Maryville University next fall and will be majoring in Interactive Design which is a combination of graphic design and animation. I could not be more thankful for the eComm program showing me what it takes to be an animator. I will be taking this information with me to Maryville where I were prosper even more and hopefully fulfill my dream of becoming a Pixar Animator.

If I could have done anything differently, I would have forced myself to work with the 3D program MAYA more. 3-Dinemsional animation is not my strong suit so I definitely need to practice it more.

In conclusion, I just want to thank my teacher for inspiring me to pursue animation. It is because of eComm that I have this dream. Thank you for the memories. It's been fun.

Monday, December 19, 2016

Animated Short Film Review: The Present

The Present tells the story of a teenage boy and his growing relationship with his dog. The opening scene shows the young boy playing a video game. The viewer can tell that the kid is addicted to playing by the way he responds to the light when his mother opens the blinds. The mother sets a plain box in front of him saying it is for him. The boy opens this present and out pops a puppy. Excited, the boy lifts up the small dog. The boy notices that the puppy only has three legs and suddenly looses interest. He rejects the dog and ignores its playful joy. During this scene, the puppy is playing with a ball while trying to make the boy play fetch with him. Finally, the boy is intrigued by the dog and decides to take him outside. To the viewer's surprise, the boy is on crutches with a missing leg.

To the naked eye, it would appear that the present is a dog. However, the real present for this boy is the motivation to have a life. Before the present, the boy would play video games. He didn't want to be on his feet because it reminded him of his crutches. He couldn't find joy in life until the puppy showed him it didn't matter if he had crutches. He has the capability to do more in life.

This animated short was put together very well. It has a clean look with simple textures that go along with its cartoon style. The characters were very well modeled an rigged. I especially love the dog and his energy when playing with the bouncy ball. The story was simple and surprised the viewers in the end. It is not until the end that the viewers realize the purpose of the boy's actions.

I wish to make heart warming films just like this. I love films that make you think and feel for the characters. I believe films should always have a good message behind their story. Sometimes the message is not as obvious as others, however, that just encourages the viewers to seek the message.

Although this was a very well animated story, there were some flaws. I believe that the fact that the story is unclear til the very end could be seen as confusing to the viewers. Another critic I would make is the details of the setting around them. Although it was animated very well creating insight to the boy's background information, the objects were seen as distracting to me.

This is a successfully made short film that has grown very well known in the film business. I hope to make a story like this as well that captures the hearts of others.

Coloring Tutorial

The color scheme an artist uses applies to the tone they won't to set in the image or scene. Dark grays and browns imply mystery and fear. Bright pastel colors represent warmth and happiness. Faded colors represent age, abandonment, and isolation.
Colors are important because they play a key part in displaying the story and nature behind the artwork. 
The first step of understanding color is to understand shading: the darkening of an illustration. 
Darkening pieces of an illustration helps show the shadows of the curves and corners of the image. It shows depth. To understand where to shade dark, one must first identify from which angle the light source is coming from. The parts of the picture blocked from this light source will be the darkest.

This also works for colors as well. You can shade an image with a specific color by using the brightest and darling forms of those colors. 

In scenes with multiple colors, you must develop a color scheme. The colors you use must coordinate in a specific way that goes along with the tone of your image. 

These are some examples of color schemes I have used to create moods. 

This is an image of a tall building. By using dark blues and grays to create the view of a dark and stormy night. 
At the top of this image shows the color scheme I used for this landscape. The calm and warm colors are supposed to show a peaceful, sunny day.

Thursday, October 13, 2016

Day Dream


 I just finished my 2D stop motion semester project called Day Dream. I combined my artistic skills and my animation skills into one animation that I plan to use for my portfolio. I wanted to challenge myself by having my animation be more detailed and realistic.
This animation is more focusses on technique than story plot. To put it in simple terms, this animation is about a girl looking for inspiration for her drawing. She begins to day dream. Her rapid change in thought is shown through each subject transforming into something different. In the end, the girl is struck with an idea and begins to draw on her paper.  

I drew each frame of my animation on paper and scanned it into the computer. Then, I dragged those images into Adobe Photoshop CC and lined them up next to each other. I decided to color over the frames with low opacity to give a sketchy effect to my animation. To add to the idea of dreaming, I am only colored the frames that the girl is dreaming of. I kept the scenes outside of the dream black and white.

This is a picture of a portion of the frames
I drew for this animation. 
It took me all semester to put this project together and it still is not fully completed. I definitely feel that this project has challenged me and has allowed me to grow as an animator. I have learned the importance of the number of frames I used per second. During the process of making this film, I struggled with timing out each section. My animation moves at a fast pace making the experience of watching my film a little confusing. There is not enough time between transitions for the viewers to process what is happening on screen. I will be going back into this animation to add music and more frames to make the 2D transitions more pleasing to the eye. 

This animation is twenty seconds long and is made up of more than a hundred frames. This project was time consuming and took a lot of patience, however, I am satisfied with my ability to draw frame by frame. I love the informal outlines of each frame. It makes the animation look as if it is being told on a piece of paper. Over all, I am proud of the work I have done for this project. I can not wait to see the improvements I make as I apply what I've learned in this project to my next idea.

I hope you enjoy my quick animated film, Day Dream. 


Wednesday, May 18, 2016

My Reflection of the Year

I can't believe it has been a year already! I guess time flies when you're having fun(:

I have learned so much this year- mostly in 2D animation. This year I have been working in After Effects and Photoshop creating 2D styled short films. Lately, I have been working in Photoshop and practicing how to draw each shot frame by frame. Although it takes forever, I really enjoy that style of that type of animation. I find it beautiful and believe every frame is a piece of artwork.

I have learned about time management- you kind of have to know how to do that since animating is a very time consuming thing. I have noticed that it is important to stay focused and to be on task. By following this step, I am able to get my work done faster. However, in animation, it can get challenging working on one project for so long. A tip I use is when I get bored is I transfer to a different project I'm working on and switch back and forth every now and then. This helps me keep high energy and excitement for my animations.

I have learned about story making and how to express emotion into your animation. I have learned that animations do not have to be fancy with detailed drawings in order for it to tell a story. In my animation Crooked, I used stick figures because I wanted the audience to focus more on the story itself instead of the characters in it. To make the audience feel what the character feels you have to make them connect to the character. You must put emotion into the character in order for the viewers to show emotion for that character. In my short film, I made my main character- Skully -have a feature that makes him stand out from the others. Everyone at some point in their lives have felt different from others. This allows the viewers to connect with Skully. My story is about embracing your differences and believing you are special in your own way. I believe I was successful at creating a simple but heartwarming animation.

I have learned how to work with others as a team. For example, in my group and I's animation Montage, we had to compromise on what type of animation it would be, what the story was, who would be doing what job, and so much more. By keeping open minds and positive attitudes, my team was able to band together to finish that animation.


I have learned about how to draw from perspective. For example, I animated a ballerina dancer spinning. While she is spinning, the viewpoint of her is kept stationary so I had to draw each frame from that perspective. It was challenging. As her leg came closer to the "camera", I had to draw it as if it was getting bigger and rounder. It looked unnatural at the time but when I pressed play, her spin looked more natural and graceful.

One thing I would change about this year is to make time to learn more about 3D animation. This style of animation is essential to leaner if I want to pursue my dream of becoming an animator.

I am going to take what I have learned from this year and apply it to my summer. I  plan to take four hours out of my day to draw and or animate. This will help me develop my portfolio for college.

I am excited to come back to eComm next year and see what senior year has for me!

Sunset

For this assignment, we had to show time passing through an animation. Examples such as: A character aging, an object rusting or decaying, or seasons changing. 

I decided to animated a 2-Dimentional sun setting. I originally came up with this idea when in the process of developing a story for a different animation I'm working on- The Artist, coming soon. 
I made this animation using the two programs Photoshop and After Effects. I first drew the landscape of my sun set. I made every level of the land a new layer. I wanted to make my animation with a variety of colors and nature. The image shows purple mountains, glistening waters, pink flowers, and a mixture of orange, pink, and purple clouds. 
One feature that was important to me was the sky. I personally love the sky and wanted to show its beauty through this animation. When I look up at the sky, I see a painting full of rich warm colors that blend with one-another. One minute the sky is orange and purple; the next it's cotton candy colors. I wanted to capture these transformations in my animation. As the sun sets, the sky color changes colors in the background. When working in Affect Effects, I had to manipulate the opacity of each sky layer to blend them together and create a beautiful transformation from day to night. 
To make the scene look as if time of passing, I had to animate the clouds to move across the sky. If you watched the sky closely, you would find that the clouds move across in slow motion. Another trick I used to show time in my video is ridging the sun's rays to fade away as it continues to set. As soon as the sun is hidden behind the mountains, the stars come out and the picture slowly fades to black.  
I had a lot of fun creating this animation and bringing this drawing to life. Hopefully you will see it again in my new animation The Artist that I am currently working on. 
Just a heads up! This animation is supposed to look as if it was a recording of a sunset sped up. It is only 10 seconds long. 


Friday, March 11, 2016

Ball Bounce Tutorial


Today I am going to share how to use 2-dimencinal animation to make a ball bounce. This is to help anyone who is interested in 2D drawing to learn the basics of drawing frame by frame. In this lesson you will learn how to use a motion scale, Photoshop, and how to render the video. 

Lets begin(:


The Step by Step Process: 

  • Materials needed: At least 15 pieces of paper, a pencil, computer/Photoshop
  • Take out a piece of paper and draw a straight line out the side that goes across most of the paper. This is going to be your motion scale. A motion scale is a helpful tool you use when planning out the motion/speed you subject is doing to the scene 
  • On your motion scale, begin to make line marks that tell you where you want the ball to be during each frame. In my ball bounce example, I used 15 sheets of paper meaning there are fifteen frames. In the image out to the side, it shows what my motion scale looks like. Each line represents a frame.
  • When drawing out your lines on the motion scale think about the motion of your ball and what you want it to do. It the ball being dropped from a height? Is it bouncing off the wall? Or is it bouncing across the screen? These questions will help to plan outlaw the ball will move in your animation. In my example, I made my ball look as if it were dropped and made it bounce up and down. My motion scale shows that the ball slows down when reaching the top (that is why the lines are close together) and then speed up when approaching the ground (that's why the lines are spaced out at the bottom). 
  • You want to make the ball look realistic like an actual ball that bounces. When the ball bounces up, it slowly comes to a stop when it reaches its maximum height. When the ball starts to fall back down it moves faster the closer it gets to the ground. This is because when the ball bounces up, it is working against gravity which makes it move slower and slower the more it goes up. When the ball moves down, gravity is working with the ball and helping it move. This increases the speed of the ball when traveling downward. Who knew Physics applied to animation!?!?
  • Once your done with the scale, start drawing the ball next to the scale's line. Each ball frame must be drawn on a separate sheet of paper so when you pull the pictures into Photoshop and line them next to each other; it will look like the ball is moving and not just one still image. 
  • When you are done with the 15 or more pictures of the ball, you can then scan it onto your computer. 
  • Once it is on the computer, open up Photoshop and drag the images of the ball onto the program. 
  • Then, click the button "Create Video Timeline". This will allow you to start animating the ball bouncing. Once clicked it will open up a timeline at the bottom of the screen showing all the layers you dragged onto it. 
  • Short each layer of you drawings to one frame each
  • Then, drag the layers/drawings into one of the columns in order. This should look something like the purple image below. 
  • After this, press the play button to the side and watch your drawing com to life. 
  • Fix any errors you see in the animation. 
  • Once you think the animation is finished, then go to File-Export-Render Video. Make sure it exports as a mp4. 
  • The final step is to sit back and enjoy watching your 2D animation! 


This is what your ball bounce should somewhat look like in the end. 

Wednesday, March 9, 2016

Montage

Project Overview:

This next animation was a group project in my class. We were assigned to create a stop motion animation meaning we had to take still shots of our subject-each with a slight change in position- and put them together. This gave the allusion that the subject was moving and doing its own actions.

My group and I wanted to have our animation tell a story. After brainstorming numerous ideas we decided to make a stop motion animation about a dragon who goes on a montage and travels through the computer.

StoryBoard:

 The next step was to assign roles to everyone in my group. I was incharge of creating the storyboard and plotting each kind of shot to take when animating and or filming.

Our story was inspired by a dragon named Drougue that-our head animator- Hanna Brady formed out of clay. We felt it would be interesting to have him be our subject and watch him make to life.

Our story starts off with Drougue stepping up to the computer's keyboard and searching for montage music on google. All of a sudden music begins to play and Drougue decided to explore the computer by walking into it. He transforms into a 2D character as he makes his transition into the computer screen. While inside, Drougue stumbles upon old animation folders and opens them up. As he travels from computer to computer, Drogue invites the other animations to join him on his "montage". Eventually everyone follows him out of the computer making them all change into clay figures. The very last scene is all of the animations deciding to watch an animated movie ending the montage.

This is the Montage storyboard.
It was my job to sketch out each scene describing how the shots were going to be animated.

When storyboarding I tend to add notes next to each shot to help organize the story and how we are filming it.

After storyboarding our animation, the next step was to scan each image onto the computer. I had to create a slide show in After Effects containing each shot from the storyboard. The purpose of this was to plan out how long each shot was going to be when filmed or animated.


In order to create the slide show, I had to crop out each shot in Photoshop and then drag it into After Effects. While in After Effects, I had to place the shots in the order we wanted to film it. I also had to trim the shots down to however many seconds it was going to take to animate it. This was to help calculate the number of pictures needed for the shot. For example, if we planned for one stop motion shot to be three seconds long then we would need thirty-six pictures of the character moving. In the end, After Effects informed us our animation will be around two minutes long.


Characters:


These are the main characters of my group's stop motion animation.

This is Drougue. He was the main character to our story. 

This is the Blue Dragon and the Melon Girl. They are the first two characters Drougue meets on his adventure.
This is Chucho. He is a green dragon and joins the journey with Drougue in the film. 


This is SAM. He is a unique character that follows Drougue and his new friends near the end of the film.

The Process:

It took a lot of time and effort to bing this story together. My team and I had to shoot the stop motion scenes outside of class using a camera and tripod. We had to take a picture each time we slightly moved our character. This would give the illusion that the character was moving.
Drawn By: Jessica Love


We had a three types of animation appear in the film: Stop-motion, 2D, and 3D. It was challenging to accomplish all three types of animations and still complete the project on time. Our Head Animator, Hanna Brady, took on most of the responsibility of creating the 2D animation. She drew the motion of every character per frame on the computer. Side Animators helped draw a few individual shots as well.

Every animation starts with a drawing. You must draw out each frame in order to have a smooth animation in the end. Once you are done drawing, you must scan the shots into the computer. On Photoshop, you must place the pictures in order so and make sure they all line up so the transition in motion looks clean. Another important reminder when animating is to time out your scene to make sure the animation is at the appropriate scene. Once this is done, then you can color over each shot. These steps will help bring your still drawing to life!

We used those steps when animating our project.

Final Thoughts:

I had fun making this film and although it took a long time to finish, I believe my group and I did a good job and our first attempt of the stop motion animation. Hope you enjoy the film!


Tuesday, December 15, 2015

Crooked

I was given the opportunity to create my very own animation. I had many ideas but for this project I wanted to focus on my story making skills. In the end, I decided to create an animation about a stick figure who is different from others but soon learns to embrace his difference. 

My main character is named Skully. I named him that because from the way I drew him, he looks like he has scoliosis. I wanted to keep the art work simple so the viewers could focus more on the story. 

My story starts with a shot of two stick figures having fun, playing with a kite. Then, it pans to a shot of Skully. He decides to ask them if he could play too but when he asks, they reject him because he is different. Later that day, skully sees the two other stick figures still playing with their kite. Suddenly, the wind blows their kite into a tree. They try to reach for it but they were not tall enough. The two decide to give up and start walking away. Sully felt bad for them and decided to try and help them. At first, he wasn't sure how to help them but then realized he had something that the others didn't. Skully used his disability to stretch and grab the kite. The two stick figures watched with amazement and realized that they should not have judged Skully for being different.

Storyboard:

Here is a look at my story in a little more depth. 


My Process:

 I made this animation in Adobe After Effects but drew my characters and scenes in Photoshop. It didn't take log to draw because of its simple design and color. After creating all of my shots for the film, I imported all the psds into Adobe After Effects where I used key points to make each character move. 

However, before I did that, I had to use the puppet tool to create what would best be described as bones. The puppet tool gives the characters' arms and legs points to help move you character. This gave me the opportunity to put my characters in any position I wanted them too. 

Once I gave all of my characters "bones", it was then time to use the key points to make the characters move from position to position. 
The hardest movement was the walk cycle. My characters' designs made it difficult to create the appearance of walking (not to mention I'm a perfectionist and had to redo a lot of the walking scenes because it didn't look right). To complete the walk cycle I used a piece of paper as a line across the screen to make sure the legs were walking in a straight line.


Another challenging part of my animation was figuring out how to make the crooked back unbend into a straight line so Skully could reach the kite in the tree. At first, I tried using the puppet tool but it did not give clean looking transition. Then, I tried to make separate pieces that made up the back so that I could rotate all the curves into one straight line. However, the pieces didn't line up quite the way I wanted it to. 
I decided to ask my teacher if he had any ideas of how to fix my problem. He suggested created a vertex on After Affects and make it into the shape of Skully's back. This gave me the chance to move the points on his back from curvy to straight. After following my teacher's instructions, I couldn't be more happy with the turnout of my animated short film.

Once I finished all my scenes, I then had to find music. I wanted instrumental music that went with the mood of each scene. It was hard to find this type of music but I finally found music that (somewhat) suited the film. I'm still a little nervous about the music and am not certain whether I really like it or not but oh well. 

I am happy that I a finally done with my animation. I believe my hard work in class has paid off. I do believe it came together well and all though the story is a little cheesy I am proud of myself. This project has allowed my to recognize my strengths and weaknesses. I plan to use this information on my future animated projects. 

Hope you like my film!


Saturday, October 10, 2015

Steal Like An Artist

I just read a short novel that I purchased called Steal Like an Artist by Austin Kleon.

This book is about how artists find their inspiration in the stuff around them. It gives the reader an insight on creativity and how to prosper as an artist.. or animator(;

The author's main idea is that nothing is original. One may find this hard to believe but it was even stated in the Bible.

"There is nothing new under the sun." (Ecclesiastes 1:9)

Kleon believes that everything has to come from something. Creative work is found from what came before it. When you first think about it, the topic seems depressing but it is actually freeing. The sooner an artist can accept it, the sooner they can embrace it. There is no more pressure of being completely original. 

The author believes ideas come from the influences you surround yourself with everyday. The only way to become better is to expand your mind.
How would one do this?
The answer is simple. Collect knowledge. The more your head expands from books, movies, and everyday sights; the more you can choose to be influenced by. After-all, our own ideas are just clumps of other ideas that inspire us. 

Kleone encourages artists to take a notebook wherever you go If there is something you see or hear that you find interesting write it down because it could lead to something amazing. An artist is a collector because they take the things they love and build off of it in their own image. Inspiration is all around you so when you see it, steal it. 

I loved this book. I believe the author challenges the reader to look at being an artist in a different way than one would. Kleone makes a good argument. When I first started this book, I was skeptical. I believed there were a lot of movies and books in the world that are so unique and wonderful-for example disney- but the more I read the more I became convinced. It made sense to me that in order for an artist to create, it must be inspired with something around him/her.

The knowledge one would take out of this book depends on what kind of person they are. Take me for example. After reading this book, I wish to look more deeply at the world around me and embrace any ideas that will inspire me to animate a story worth stealing someday.

Citation: Kleon, Austin. Steal like an Artist: 10 Things Nobody Told You about Being Creative. New York: Workman Pub., 2012. Print.
  

Tuesday, September 8, 2015

Short Film

Feast Analysis:

An animated short film I admire is Pixar's production of Feast. 

Feast is a romantic comedy that expresses a well told story about man's best friend. This anecdote gives an inside look on how Winston, the dog, reacts when his owner starts to date.

In this story, the protagonist, Winston, is introduced to a new life style after his owner takes him in off the streets. It wasn't a challenge for Winston to adapt because of his deep love a food. As time goes by, Winston and his owner's bond grew. Later in the story a woman gets introduced, causing Winston's life to go sideways. It wasn't until one day when Winston realized life wasn't about food, it was abut making his owner happy. 

The Feast is an example of how caring and helping your friends and family is more important then objects or even food...

How was Feast made?

This animated short is a 3D hand-drawn/ computer-animated film. Animators used the Meander System to create this short film. It was the first film to use this program in color. The texture, also, was used to create an illusion that made the finished product look as if it were 2D. 

As you watch the video, you will find that most of their shots were the same. This is an artistic technique used to show quick cuts of each shots. In fact, animator Patrick Osborne, said that the story of Feast was based off of the app 1secondeveryday. This app allows users to create 1 second videos and mash them together, making a story. Osborne used this app to create a video of the dinner he ate. This gave him the thought of making a nice short film based off the app.


I also noticed in the film that the people are blurred out. The only thing in-focus is the dog and his food. This is to keep the story's target on it's main character. After all it is a story about a family coming together through the perspective of a Winston and his meals.

I really enjoyed this short film because it shows a lovable dog who witnesses his owner finding true love. He realized that he loved his owner more than his food.
I loved how they edited this story with the repeating short. I think it was really original and different compared to other shorts. It gives a different look on how to capture the story. I can only hope  to be this unique.


Friday, September 4, 2015

Fish


It all starts with a doodle…
My goal of my animation was to create a 3D swimming fish on the Maya Program.   


I had to start out simple. I made sure to draw a fish that had little plain features. After sketching out my fish I scanned it onto the computer and pulled it into the Maya Software. It was there that I began to shape out my fish. I started out with a cube and began to move the vertexs causing the figure to stretch out. I had to use tools that allowed me to extrude my shape, creating the parts of the body such as the lips, fins and tail. I cut my fish inhale with the slicer and used the symmetry tool to create two equal sides of the fish. I screen shouted a picture of the shape of my fish after completing it and dragged the picture in Photoshop because the next stage was coloring.

I wanted my fish to have contrasting colors, so I used the colors blue and yellow. There is also a hint of orange. I felt accomplished with my design I created. I feel that it is unique and resembles what looks like a real fish. You have to save your design as a png in order to wrap the design on the subject.

In Maya, you must add a phong texture and download your file with the design onto the fish. I had to make sure the design lined up with the body, otherwise, the finished project wouldn't come out right.

After attaching the textured design, you had to create eyes for your fish. What I did was take two spheres and put them where the indented sphere shape was on my fish.

The next step was a little tricky. I learned how to create bones for my sea creature. In Maya, the bones are joints and allow you to move your subject more effishiantly (You see what I did there?). All the bones should be connected and lead back to the main bone that will be used to move the entire body.

After lining up on the bones you your fish the next step is to color the bones. To color the bones you had to color the parts you wanted to move white for each bone, the other parts should have remained black. This sounds easy, however, it was very challenging for me. It is difficult because the white paint puts weights on the bone, if you put too much white on one bone then it could all concave on each other because it's too heavy. I know this from experience…

After I finished painting the bone, it was then time to make my fish swim. I used key points to plot where my fish would move too and what angle its tail would be "wagging" to.

My project came together pretty well. I wouldn't change a thing except maybe being more careful with the bones. I know that now. The process of making this animation was a great review for me and also taught me new technics. I can't wait to see what I will be creating next(:


Thursday, May 21, 2015

Final: Land of the Lost

I have done some awesome projects in animation, but this one has been my favorite!

The assignment was to take all we have learned throughout the year and combined it to make into one video. This includes: 3D animation, special effects, 3 point lighting, and green screen technology. 

My group brainstormed ideas. One of the members in our group thought about making a Back to the Future film. We all agreed on it and started story boarding. Our conversation changed to the old Land of the Lost TV show. We looked up the theme song to it and ended up  loving it! That's when we realized that we should base our project off of Land of the Lost.

It didn't take long to storyboard because our film was going to be mimicking the Land of the Lost intro theme song.
https://www.youtube.com/watch?v=gwvguf_0kUw

Our group then assigned roles to everyone.

I was the director of the film and was in charge of putting the whole film together on Adobe After Effects. Corey Eaton was the director of photography and filmed the shots of us in the green screen room and the closeups of the steam from his backyard. Hanna Brady was in charge of the 3D animation of the Land of the Lost title. Brianna helped by making graphic designs for the credit scenes and Kate made the storyboard.


In this film we didn't actually record ourselves floating down a river in a raft, it was what we call movie magic! This magic came from what is called a green screen. The green screen gives us the power to transport ourselves to another place while still being in the same room. What we did was place ourselves in front of the green screen and record as if we were in the river. In the animation software, After Effects, you can change the background into whatever you want (in this case a river).

After filming all the shots needed, we imported them into After Effects. I laid each shot in order and began the green screen transformation. The first step is creating a magenta matte to go behind all of my camera shots. This is because magenta is the opposite of green. I then created a Color Key Effect that turns the green color into that magenta. It is important to not have shadows of your subject while filming in the green screen room. The shadows are harder to get rid of (a tip is using the three point lighting technic).


After color correcting your subject so it goes along with your background, you are ready to drop the background in.
Once the background is placed under the shot you want it to be you can begin scaling, moving, or rotation your subject. The Color Key effect allows your background to become invisible so you don't have to worry about the green color. 
The green screen transforms this…
...into this(:


I the original video, Land of the Lost, it had an earthquake appear. Through the use of movie magic we were able to make that earthquake possible in our film. Our director of photography, Corey, found special effects to use to make it look like rocks were falling onto us and splashing into the river. This is one of my favorite shots of the entire film because it is funny to watch and really adds to our video.
After doing all of this work we then added the Land of the Lost theme music.

Hope you enjoyed our film!

Friday, May 15, 2015

Misdirection

We called this film Misdirection. It is about a street magician named Will, who's mother is ill. She lives in a nursing home and is facing serious debt problems. Will is overwhelmed by the situate and decides to steal the wallet of a volunteer during his magic trick. Relief rushed over him until later that night. The volunteer (Matt) confronted him, accusing him of stealing the wallet. Will was frightened and quickly started running. Matt chases Will into an alley and all you hear is the sound of two gun shots. The final shot is a mysterious hand putting a stack of cash on the nightstand of the mother's bed.


This film came together very well in the end. When coming up with a story, we had to make sure it included a water bottle, a hat, a light source, and the phrase "Light's Out". The scope of the project was to combined all that we've learned this year and make it into a video.

 My group wanted to make a more serious film to challenge ourselves. We spent the first few days coming up with the plot and writing the script. Then, we assigned jobs for everyone to do. I was in charge of storyboarding out all the scenes. In class we would write down locations to shoot our film. It was difficult because our story couldn't be shot during school hours. While other groups were filming their stories, we were gathering around a table figuring out the locations, the storyboard, the script, and the cast.

Once we figured out everything, my group was ready to start filming. After school on Friday, May 8th, We met up at Corey Eaton's house to shoot the first scene. We decided that Lucas Scott and Kaleb Axe will be our two leads. We asked Graham Petter's mom to play the mother in this production. Everything went well for scene 1.
The director of Photography (Corey), got a lot of close up shots that helped with the intro to our story. He also recorded scene 1 in various angles so later in the editing process we would have multiple shots to work with. After scene one was completely recorded, we headed to downtown Lenexa where we shot the rest of the footage.
One of the problems with shooting at sundown is that you have to film quickly, otherwise, your lighting for the scene goes away. However, we did manage to get all the shots needed for this scene and it ended up looking really cool!

Editing this film was a trouble for me because I was sick and had to miss school for two days. I stayed after school for a couple days trying to catch up on work. Luckily, I managed to finish it in the nick of time.
After reviewing each of my groups videos, I noticed how differently everyone edited theirs. For example I used flashbacks and sound effects in my video while others in my group used music to go with the serious tone. However, all of them turned out great. I am very proud of my group for pulling together.

I have learned a lot about video for the past year. It has impacted me and made me closer to my goal in life. Overall it has been a fun year and I wouldn't change a thing(:

Sunday, February 1, 2015

To Sum It All Up

This post is a quick summary about all the animations we have created in class this semester.


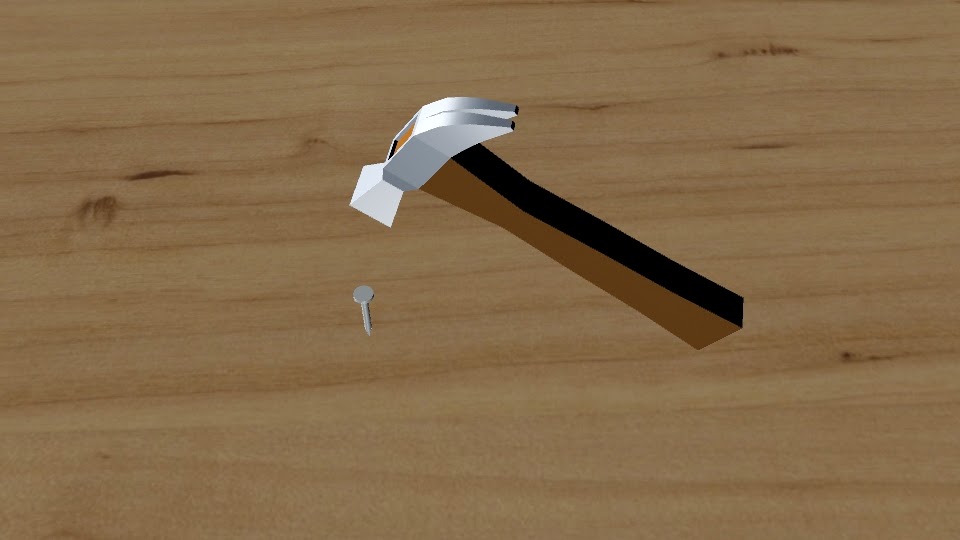
This is a hammer and nail I created in eComm. In this project I learned how to extrude faces and split polygons. Extruding faces allows me to make a certain side of the polygon extend and get bigger/smaller. When splitting polygons, I use the Cut Faces Tool. The tool allows me to draw lines onto the polygon and turn one face into two. These tools came in handy when creating the claw peen and the hammer head on my animation.

In eComm we built an Ice-cream shop. This included animating ice-cream, table, a bowl, a    scooper, a cone, and an ice-cream stand. To make these items we Extrude Tool and had to combined many polygons. For the ice-cream we used the Bump Maps to give it a texture similar to real ice-cream. I also decided to put all items on the table onto a Lazy Susan. I used keyframes to animate the items spinning on the Lazy Susan and put it on a Loop.
This next project was a bit tricky. I animated three different balls bouncing. The project was to show the difference between each ball that bounces. I had to use many keyframes and time each balls bounce. The Graph Editor helped me in this process. It shows a grid of each balls bounce and lets you change the way the ball bounce to make it look more real.
I loved this next project! In class, I animated a glass cup and a jar. I couldn't accomplish this animation without NURBS (Non-Uniform Rational B-Splines). This helped me create smooth curves for my jar and cup. Using the Curve Tool, I outlined a cup on the graph creating curves. After I doing that step I used the Revolve Surface Tool which duplicates my curves that I outlined, creating a cup. For my jar, I used the same process and decided to make it look like the Honey Pot from Winnie the Pooh. I am very happy with the way they both turned out.

I made an animation of the salt and pepper shakers from Blues Clues. I used the Shelf Icon to create the first circle curve. I then selected symmetrical vertices and scaled them down to get the base shape of the salt shaker. After that, I duplicated it and started them on top of each other till I though it was a good height. I created another circle and put it on top. Once I created the shakers shape I put a loft surface over it. This creates the curves making the salt shaker 3 Dimensional. I then created a top for my shaker. I drew out a sphere and put it on wireframe view. I changed the vertices to make the top of the sphere more flat. After that, I deleted the bottom half of the sphere using Boolean Difference. I next worked on punching in the holes on the top of the lid. I created a cylinder and copied it using Duplicate Special. This makes the cylinder appear on the lid eight times in a circle at forty-five degrees. I then did Boolean Difference again creating the holes for the salt to fall through. This concludes the process of making the shape of the salt shaker.
This animation is called the Polything. To make the Polything light up we used three point lighting. Three point light is when you use three lights and point them at the subject from three different sides: the front, the side, and the back. In the project we mostly used the Directional Spot Tool. Other lights include: ambient light, point light, spot light, area light, and volume light. These lights help us show the object more realistically. 

Sunday, December 14, 2014

These Are Not the Donors You Are Looking For


In Video class we were assigned to make unscripted videos where we will film and interview one person about what they are doing. The goal is to create a story. In our first project we were assigned partners and had to film them building a Star Wars Lego Spaceship. We were also assigned to film the ONW Blood Drive.

My Process-                                                               Lego Project:
These kinds of project does not require you to storyboard. It is unscripted with live action. While filming, I tried to get all six shots. This project was difficult because I didn't know what was going to happen and how the footage would turn out.

What did I learn?-
These assignments taught me a lot about unscripted filming. When filming, you couldn't have a tripod. I learned how to hold a camera steady and keep me balance. I learned how to stand close to the person your filming. This allows you to hear the subject when he/she is talking and to get good close-ups. In the editing stage we learned how to do J and L edits. J and L edits are when you take a clips of video or audio and overlap them making a J or an L. Nat noise is also required in this project. It makes the video seem more real and helps the audio flow together. All this helped me create my lego project below.

What would I do differently?-
The Lego project was harder than I would have expected. Looking back on my footage I realized, I didn't hold the camera steady enough. This made is hard to find good shots of of my subjects I was filming. If i got the chance to redo these assignments I would have gotten more of a variety of shots. In my Blood Drive video, I didn't get the chance to film my subject donating any blood. This made it hard for me to create an ending in my store. My solution was to make the very last shot of my video turn into  a horror film. I also would have asked more questions. In my Lego project I didn't ask enough questions while filming. This caused my video to have a lot of voice overs in it. I believe fixing these problems will make my videos more professional and interesting to watch.

What would I do the same?-                                      Blood Drive:
Out of my two projects, I would keep the interviews I did in the Blood Drive project. My group had to share a camera. Unfortunately, we didn't get to finish filming but, we decided to take all of what we filmed and combined it. This made my Blood Drive video more interesting because it showed the thoughts and opinions of multiple people at the blood drive.

What experiences will you draw from to enhance your next project?-
These assignments have taught me many things about unscripted filming. I will remember to ask more questions to my subjects. I will also remember to manage my time and make sure I get enough footage.  I will learn from the mistakes to make my next video even better! This will make my future videos look a lot more professional.

Saturday, November 22, 2014

A Hike For Food

The class was assigned to make a 2-D animation with three different shots. In order to create this animation, we had to combine everything we learned from the past assignments. When brainstorming for story, it is important to think of an idea that is not too complex as it would take too long to make. I started doodling characters on a piece of paper and tried to get inspired. I personally liked my drawing of a bunny. It was simple and I thought I could create a good story inspired by that drawing. I decided to make my bunny try to pull a carrot out of the ground. When he does, things get more complicated.The carrot will fly onto the mountain behind him forcing himself to climb the mountain to get the carrot. Once I planned that out onto my storyboard, I was ready to start the project. First, you had to scan your drawing of your character onto the computer. Then you must color it on Photoshop. Also you have to create the background settings on Photoshop. After this, you get to drag the layers of your character into Adobe After Effects. This program allows to move your character and make the story you want. You use key points to help position or rotate your characters. I learned how to make pre-compositions. They help you stay organized with all your layers. I had to make sure that all the compositions were put in the right place so that each clip would move nice and smooth. I also learned something about myself. I am a perfectionist. Usually that's a good quality to have but in this case, it kept me from completing my project on time. Project deadlines are very important. You can't become a professional animator without completing your work on the day it is due.
If I could redo this assignment, I would look back at my leg compositions and change it so that you can't see the top of the back leg when it goes up. I would also make sure all my layers of my character in Photoshop have a completely deleted background, While editing my animation, I noticed that some of my layers still have little spots from the white background. I think doing this will make my animation look better and more professional.
I would keep my story the same. I like how it is creative and simple. I would also keep my character the same. My bunny is a simple character and goes with my story very well. I like my close-ups of bunny's arms pulling the character. I think it is a cool shot and helps the viewer focus on what the bunny really wants.
 This experience has made me a better animator by pointing out what I need to work on for our next project. I am one step closer to becoming a true animator and reaching my goal.
I will take what I learned from this assignment and use it for our next project. I loved this activity and can't wait to do the next one!

Tuesday, November 4, 2014

Break Free


Our assignment was to create a music video. The video would have to tell a story and last at least ninety seconds. It also had to go along with the music and made sure the shots went with the beat. We had to think of these things before we started story-boarding.

Our group decided to use Ariana Grande's song Break Free. We used beat sheets to brainstorm idea's of what we wanted our song to be about. We watched music videos related to Break Free and pulled out ideas. We thought it should be about bullying and how the person getting picked on finally fights
back and break's free. We also created mood sheets, a collage of pictures that was supposed to show the mood of your video. This process gave us a general idea of what we wanted our video to be about and we were ready to storyboard. While story-boarding you have to think of the six shots and the 180 degree rule. Our group formed a group message on our phones and organized what we would film each day. This process made things a lot more easier and I felt my group was ready to film.

I learned many important things throughout the process of filming. On the days our group was filming, we had strange rainy weather. This was a problem for our lighting. The shots became yellow and dark. I learned that it is important to shoot your scenes in an environment that has good lighting. I also learned that it is important to not have any continuity errors otherwise, the viewers will become confused and not know what is going on. In our editing stage I learned how to show multiple shots at once. This gave my video a dramatic effect.
I felt that my group worked well together. We communicated outside of school to help us stay on task. We worked very hard on this video while also having a lot of fun!

If I had the chance to redo my video I would definitely film more shots. In the stage of story-boarding we edited to the lyrics instead of the beat and that messed me up later while editing. I would also redo the first super hero shot and find a way to make it look more dramatic. While planning this video we originally wanted a silhouette shot of us superheros but; it came out too dark and ruined the scene. I would redo any shots that were darkened from the weather to make the lighting better.
I would keep our story in the video the same. I believe it went well with the song. I also would keep i the flashback shots in the video because it added to the effect. I was very cool the way each shot changed with the beat. I would keep the shot of Jessica running toward Eric, the villain about to punch him in the face and the shot right after that  where it shows her hand punching Eric in the face. The two shots were the view points from the villain's eyes to the superhero's eyes. I believe these shots were the best out of all and I would certainly keep them.

This assignment was very informational. I learned about digital effects when editing such as; showing multiple shots on a screen a once and adding a slow motion effect. I learned how to give a shot the ghost effect and make it look see-through. I also learned how to add markers to the beat of the music. This helps me when transitioning from one shot to another. I will use my new skills for our class's next project.

It was very fun to film this project. I learned about teamwork. I also learned some new effects I can use on Final Cut Pro. The whole experience has taught me a lot and I can't wait to use what I learned on our next project!