Thursday, May 21, 2015

Final: Land of the Lost

I have done some awesome projects in animation, but this one has been my favorite!

The assignment was to take all we have learned throughout the year and combined it to make into one video. This includes: 3D animation, special effects, 3 point lighting, and green screen technology. 

My group brainstormed ideas. One of the members in our group thought about making a Back to the Future film. We all agreed on it and started story boarding. Our conversation changed to the old Land of the Lost TV show. We looked up the theme song to it and ended up  loving it! That's when we realized that we should base our project off of Land of the Lost.

It didn't take long to storyboard because our film was going to be mimicking the Land of the Lost intro theme song.
https://www.youtube.com/watch?v=gwvguf_0kUw

Our group then assigned roles to everyone.

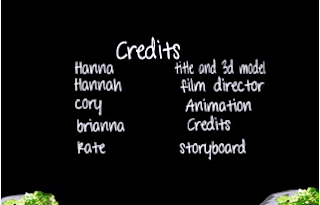
I was the director of the film and was in charge of putting the whole film together on Adobe After Effects. Corey Eaton was the director of photography and filmed the shots of us in the green screen room and the closeups of the steam from his backyard. Hanna Brady was in charge of the 3D animation of the Land of the Lost title. Brianna helped by making graphic designs for the credit scenes and Kate made the storyboard.


In this film we didn't actually record ourselves floating down a river in a raft, it was what we call movie magic! This magic came from what is called a green screen. The green screen gives us the power to transport ourselves to another place while still being in the same room. What we did was place ourselves in front of the green screen and record as if we were in the river. In the animation software, After Effects, you can change the background into whatever you want (in this case a river).

After filming all the shots needed, we imported them into After Effects. I laid each shot in order and began the green screen transformation. The first step is creating a magenta matte to go behind all of my camera shots. This is because magenta is the opposite of green. I then created a Color Key Effect that turns the green color into that magenta. It is important to not have shadows of your subject while filming in the green screen room. The shadows are harder to get rid of (a tip is using the three point lighting technic).


After color correcting your subject so it goes along with your background, you are ready to drop the background in.
Once the background is placed under the shot you want it to be you can begin scaling, moving, or rotation your subject. The Color Key effect allows your background to become invisible so you don't have to worry about the green color. 
The green screen transforms this…
...into this(:


I the original video, Land of the Lost, it had an earthquake appear. Through the use of movie magic we were able to make that earthquake possible in our film. Our director of photography, Corey, found special effects to use to make it look like rocks were falling onto us and splashing into the river. This is one of my favorite shots of the entire film because it is funny to watch and really adds to our video.
After doing all of this work we then added the Land of the Lost theme music.

Hope you enjoyed our film!

Friday, May 15, 2015

Misdirection

We called this film Misdirection. It is about a street magician named Will, who's mother is ill. She lives in a nursing home and is facing serious debt problems. Will is overwhelmed by the situate and decides to steal the wallet of a volunteer during his magic trick. Relief rushed over him until later that night. The volunteer (Matt) confronted him, accusing him of stealing the wallet. Will was frightened and quickly started running. Matt chases Will into an alley and all you hear is the sound of two gun shots. The final shot is a mysterious hand putting a stack of cash on the nightstand of the mother's bed.


This film came together very well in the end. When coming up with a story, we had to make sure it included a water bottle, a hat, a light source, and the phrase "Light's Out". The scope of the project was to combined all that we've learned this year and make it into a video.

 My group wanted to make a more serious film to challenge ourselves. We spent the first few days coming up with the plot and writing the script. Then, we assigned jobs for everyone to do. I was in charge of storyboarding out all the scenes. In class we would write down locations to shoot our film. It was difficult because our story couldn't be shot during school hours. While other groups were filming their stories, we were gathering around a table figuring out the locations, the storyboard, the script, and the cast.

Once we figured out everything, my group was ready to start filming. After school on Friday, May 8th, We met up at Corey Eaton's house to shoot the first scene. We decided that Lucas Scott and Kaleb Axe will be our two leads. We asked Graham Petter's mom to play the mother in this production. Everything went well for scene 1.
The director of Photography (Corey), got a lot of close up shots that helped with the intro to our story. He also recorded scene 1 in various angles so later in the editing process we would have multiple shots to work with. After scene one was completely recorded, we headed to downtown Lenexa where we shot the rest of the footage.
One of the problems with shooting at sundown is that you have to film quickly, otherwise, your lighting for the scene goes away. However, we did manage to get all the shots needed for this scene and it ended up looking really cool!

Editing this film was a trouble for me because I was sick and had to miss school for two days. I stayed after school for a couple days trying to catch up on work. Luckily, I managed to finish it in the nick of time.
After reviewing each of my groups videos, I noticed how differently everyone edited theirs. For example I used flashbacks and sound effects in my video while others in my group used music to go with the serious tone. However, all of them turned out great. I am very proud of my group for pulling together.

I have learned a lot about video for the past year. It has impacted me and made me closer to my goal in life. Overall it has been a fun year and I wouldn't change a thing(:

Sunday, February 1, 2015

To Sum It All Up

This post is a quick summary about all the animations we have created in class this semester.


This is a hammer and nail I created in eComm. In this project I learned how to extrude faces and split polygons. Extruding faces allows me to make a certain side of the polygon extend and get bigger/smaller. When splitting polygons, I use the Cut Faces Tool. The tool allows me to draw lines onto the polygon and turn one face into two. These tools came in handy when creating the claw peen and the hammer head on my animation.

In eComm we built an Ice-cream shop. This included animating ice-cream, table, a bowl, a    scooper, a cone, and an ice-cream stand. To make these items we Extrude Tool and had to combined many polygons. For the ice-cream we used the Bump Maps to give it a texture similar to real ice-cream. I also decided to put all items on the table onto a Lazy Susan. I used keyframes to animate the items spinning on the Lazy Susan and put it on a Loop.
This next project was a bit tricky. I animated three different balls bouncing. The project was to show the difference between each ball that bounces. I had to use many keyframes and time each balls bounce. The Graph Editor helped me in this process. It shows a grid of each balls bounce and lets you change the way the ball bounce to make it look more real.
I loved this next project! In class, I animated a glass cup and a jar. I couldn't accomplish this animation without NURBS (Non-Uniform Rational B-Splines). This helped me create smooth curves for my jar and cup. Using the Curve Tool, I outlined a cup on the graph creating curves. After I doing that step I used the Revolve Surface Tool which duplicates my curves that I outlined, creating a cup. For my jar, I used the same process and decided to make it look like the Honey Pot from Winnie the Pooh. I am very happy with the way they both turned out.

I made an animation of the salt and pepper shakers from Blues Clues. I used the Shelf Icon to create the first circle curve. I then selected symmetrical vertices and scaled them down to get the base shape of the salt shaker. After that, I duplicated it and started them on top of each other till I though it was a good height. I created another circle and put it on top. Once I created the shakers shape I put a loft surface over it. This creates the curves making the salt shaker 3 Dimensional. I then created a top for my shaker. I drew out a sphere and put it on wireframe view. I changed the vertices to make the top of the sphere more flat. After that, I deleted the bottom half of the sphere using Boolean Difference. I next worked on punching in the holes on the top of the lid. I created a cylinder and copied it using Duplicate Special. This makes the cylinder appear on the lid eight times in a circle at forty-five degrees. I then did Boolean Difference again creating the holes for the salt to fall through. This concludes the process of making the shape of the salt shaker.
This animation is called the Polything. To make the Polything light up we used three point lighting. Three point light is when you use three lights and point them at the subject from three different sides: the front, the side, and the back. In the project we mostly used the Directional Spot Tool. Other lights include: ambient light, point light, spot light, area light, and volume light. These lights help us show the object more realistically. 

Sunday, December 14, 2014

These Are Not the Donors You Are Looking For


In Video class we were assigned to make unscripted videos where we will film and interview one person about what they are doing. The goal is to create a story. In our first project we were assigned partners and had to film them building a Star Wars Lego Spaceship. We were also assigned to film the ONW Blood Drive.

My Process-                                                               Lego Project:
These kinds of project does not require you to storyboard. It is unscripted with live action. While filming, I tried to get all six shots. This project was difficult because I didn't know what was going to happen and how the footage would turn out.

What did I learn?-
These assignments taught me a lot about unscripted filming. When filming, you couldn't have a tripod. I learned how to hold a camera steady and keep me balance. I learned how to stand close to the person your filming. This allows you to hear the subject when he/she is talking and to get good close-ups. In the editing stage we learned how to do J and L edits. J and L edits are when you take a clips of video or audio and overlap them making a J or an L. Nat noise is also required in this project. It makes the video seem more real and helps the audio flow together. All this helped me create my lego project below.

What would I do differently?-
The Lego project was harder than I would have expected. Looking back on my footage I realized, I didn't hold the camera steady enough. This made is hard to find good shots of of my subjects I was filming. If i got the chance to redo these assignments I would have gotten more of a variety of shots. In my Blood Drive video, I didn't get the chance to film my subject donating any blood. This made it hard for me to create an ending in my store. My solution was to make the very last shot of my video turn into  a horror film. I also would have asked more questions. In my Lego project I didn't ask enough questions while filming. This caused my video to have a lot of voice overs in it. I believe fixing these problems will make my videos more professional and interesting to watch.

What would I do the same?-                                      Blood Drive:
Out of my two projects, I would keep the interviews I did in the Blood Drive project. My group had to share a camera. Unfortunately, we didn't get to finish filming but, we decided to take all of what we filmed and combined it. This made my Blood Drive video more interesting because it showed the thoughts and opinions of multiple people at the blood drive.

What experiences will you draw from to enhance your next project?-
These assignments have taught me many things about unscripted filming. I will remember to ask more questions to my subjects. I will also remember to manage my time and make sure I get enough footage.  I will learn from the mistakes to make my next video even better! This will make my future videos look a lot more professional.

Saturday, November 22, 2014

A Hike For Food

The class was assigned to make a 2-D animation with three different shots. In order to create this animation, we had to combine everything we learned from the past assignments. When brainstorming for story, it is important to think of an idea that is not too complex as it would take too long to make. I started doodling characters on a piece of paper and tried to get inspired. I personally liked my drawing of a bunny. It was simple and I thought I could create a good story inspired by that drawing. I decided to make my bunny try to pull a carrot out of the ground. When he does, things get more complicated.The carrot will fly onto the mountain behind him forcing himself to climb the mountain to get the carrot. Once I planned that out onto my storyboard, I was ready to start the project. First, you had to scan your drawing of your character onto the computer. Then you must color it on Photoshop. Also you have to create the background settings on Photoshop. After this, you get to drag the layers of your character into Adobe After Effects. This program allows to move your character and make the story you want. You use key points to help position or rotate your characters. I learned how to make pre-compositions. They help you stay organized with all your layers. I had to make sure that all the compositions were put in the right place so that each clip would move nice and smooth. I also learned something about myself. I am a perfectionist. Usually that's a good quality to have but in this case, it kept me from completing my project on time. Project deadlines are very important. You can't become a professional animator without completing your work on the day it is due.
If I could redo this assignment, I would look back at my leg compositions and change it so that you can't see the top of the back leg when it goes up. I would also make sure all my layers of my character in Photoshop have a completely deleted background, While editing my animation, I noticed that some of my layers still have little spots from the white background. I think doing this will make my animation look better and more professional.
I would keep my story the same. I like how it is creative and simple. I would also keep my character the same. My bunny is a simple character and goes with my story very well. I like my close-ups of bunny's arms pulling the character. I think it is a cool shot and helps the viewer focus on what the bunny really wants.
 This experience has made me a better animator by pointing out what I need to work on for our next project. I am one step closer to becoming a true animator and reaching my goal.
I will take what I learned from this assignment and use it for our next project. I loved this activity and can't wait to do the next one!