This post is a quick summary about all the animations we have created in class this semester.


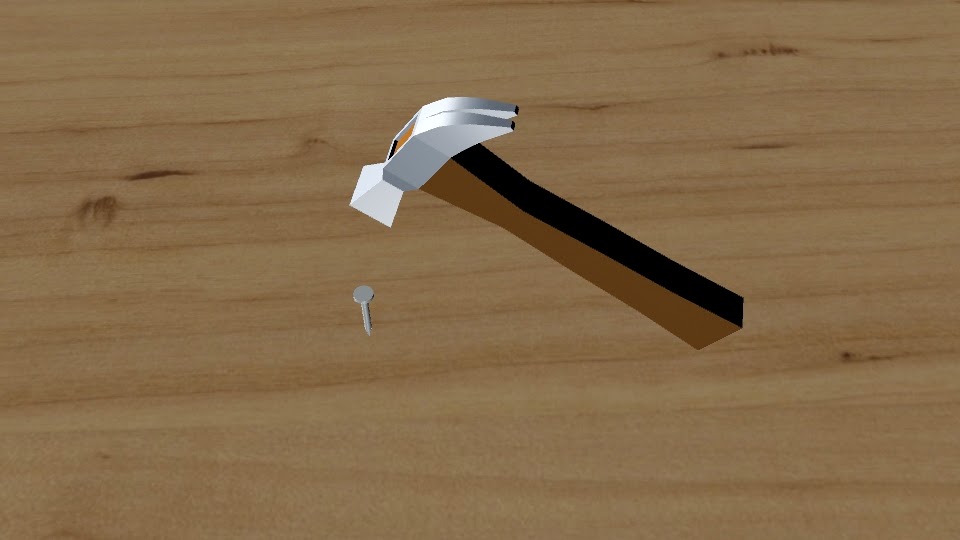
This is a hammer and nail I created in eComm. In this project I learned how to extrude faces and split polygons. Extruding faces allows me to make a certain side of the polygon extend and get bigger/smaller. When splitting polygons, I use the Cut Faces Tool. The tool allows me to draw lines onto the polygon and turn one face into two. These tools came in handy when creating the claw peen and the hammer head on my animation.
In eComm we built an Ice-cream shop. This included animating ice-cream, table, a bowl, a scooper, a cone, and an ice-cream stand. To make these items we Extrude Tool and had to combined many polygons. For the ice-cream we used the Bump Maps to give it a texture similar to real ice-cream. I also decided to put all items on the table onto a Lazy Susan. I used keyframes to animate the items spinning on the Lazy Susan and put it on a Loop.
This next project was a bit tricky. I animated three different balls bouncing. The project was to show the difference between each ball that bounces. I had to use many keyframes and time each balls bounce. The Graph Editor helped me in this process. It shows a grid of each balls bounce and lets you change the way the ball bounce to make it look more real.
I loved this next project! In class, I animated a glass cup and a jar. I couldn't accomplish this animation without NURBS (Non-Uniform Rational B-Splines). This helped me create smooth curves for my jar and cup. Using the Curve Tool, I outlined a cup on the graph creating curves. After I doing that step I used the Revolve Surface Tool which duplicates my curves that I outlined, creating a cup. For my jar, I used the same process and decided to make it look like the Honey Pot from Winnie the Pooh. I am very happy with the way they both turned out.

I made an animation of the salt and pepper shakers from Blues Clues. I used the Shelf Icon to create the first circle curve. I then selected symmetrical vertices and scaled them down to get the base shape of the salt shaker. After that, I duplicated it and started them on top of each other till I though it was a good height. I created another circle and put it on top. Once I created the shakers shape I put a loft surface over it. This creates the curves making the salt shaker 3 Dimensional. I then created a top for my shaker. I drew out a sphere and put it on wireframe view. I changed the vertices to make the top of the sphere more flat. After that, I deleted the bottom half of the sphere using Boolean Difference. I next worked on punching in the holes on the top of the lid. I created a cylinder and copied it using Duplicate Special. This makes the cylinder appear on the lid eight times in a circle at forty-five degrees. I then did Boolean Difference again creating the holes for the salt to fall through. This concludes the process of making the shape of the salt shaker.
This animation is called the Polything. To make the Polything light up we used three point lighting. Three point light is when you use three lights and point them at the subject from three different sides: the front, the side, and the back. In the project we mostly used the Directional Spot Tool. Other lights include: ambient light, point light, spot light, area light, and volume light. These lights help us show the object more realistically.


